Last updated: October 25, 2026
Quick Answer: Protect How to Protect an Irrigation System From Frozen Water Lines by burying pipe below local frost depth, making sure the line can drain dry, and insulating only the exposed sections; a 3-part approach is safer than relying on one fix alone. Frost protection for irrigation lines starts with design, not with a hose in November. If the irrigation pipe is buried shallow, trapped in a flat run, or left holding water in a valve box, a hard freeze can split fittings and crack the line long before spring.
Key takeaways
- Deep burial and positive drainage do most of the work.
- A line that can empty itself is far safer than one that traps a pocket of water.
- Insulation helps only where cold air reaches the pipe, such as a shallow trench or valve box.
- A winter shutoff is useful only if the piping layout lets the remaining water leave.
- The weak points are usually elbows, tees, backflow parts, and low spots, not the straight run itself.
What is the first thing to check?
The first thing to check is whether the pipe sits below local frost depth and can drain after shutdown. The safest way to protect an irrigation system from frozen water lines is to keep the pipe below local frost depth and give the line somewhere to drain. That sounds simple because it is simple in principle, but it depends on three site conditions: burial depth, slope, and whether the pipe can empty after shutdown.
The first check is the frost line for the property. In colder regions, a shallow trench that works in one yard can fail in the next neighborhood over. If the pipe sits above that depth, treat it as exposed to freeze-thaw damage and plan on either lowering it, insulating it, or changing the route so it can drain dry. In frost-risk conditions, consult a local irrigation pro or building department for the local frost-depth requirement. The pipe does not need to be frozen solid to suffer damage; repeated expansion and contraction can loosen fittings and stress glued joints.
The second check is the path of each run. A straight line with a gentle fall toward a drain valve is easier to protect than a level line that traps water in the middle. A flat section can hold a small amount of liquid that turns into a frozen line during a cold snap. That trapped slug is what bursts fittings and splits plastic pipe.
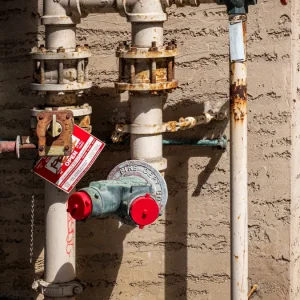
The third check is the valve box. If the shutoff valve, drain valve, and any low-point fittings sit in a box that fills with meltwater or rain, the box becomes a cold chamber. A box that stays wet, muddy, or packed with leaves keeps the parts colder for longer and makes service harder in spring.
If this is a new layout, this is the point where the design decisions belong, not the end-of-season cleanup. That is why this topic belongs under system design and planning, not under winterization alone.
1. Map the high-risk spots before you touch the trench
Therefore, map the high-risk spots first, then decide where the trench needs depth, slope, or insulation. First identify every section where a frozen line is most likely, then mark the spots that need depth, slope, or insulation. Use the sprinkler plan, the as-built sketch, or a quick surface trace of the piping path, and note where the irrigation pipe runs under pavement, along a foundation, or through low ground. Those places usually warm and cool differently from open soil.
What matters here is not the whole yard; it is the sections that cannot hold a stable soil blanket. A short run under a driveway edge can freeze sooner than a much longer run in open turf if it sits 4 inches shallow. Mark the valve box, each shutoff valve, every drain valve, and any reducer, tee, or elbow that changes direction. These are the points where water is most likely to sit still.
If the system is already installed, look for warning signs after a cold night: a damp patch where the line should be dry, a valve box lid that feels colder than the surrounding soil, or a section that frosts over when the rest of the yard does not. Those clues point to shallow burial or poor drainage.
The point of this step is a decision, not a repair. When the weak points are obvious on paper, the rest of the work becomes targeted instead of random.
2. How deep should irrigation pipe be buried?
Bury the irrigation pipe below the local frost depth whenever possible, because soil is the best insulation the line has. If the line must run shallower than that, the route needs compensating protection such as insulation board, a different slope, or a drainable layout.
The exact depth depends on climate and local code, which is why a one-size-fits-all number is a mistake. A 6-inch trench may be enough in a mild region and nowhere near enough in a hard-freeze area. If the pipe is near the surface, soil temperature swings follow air temperature swings much faster. That is how a line that looks fine all summer becomes a frozen line after a week of cold nights.
Depth also affects how long the line stays cold. A shallow pipe loses heat quickly on windy nights and stays exposed to repeated freeze-thaw cycles. A deeper run buffers those swings. That buffering matters even when the pipe never actually bursts, because moving soil and ice can strain fittings and loosen glued joints over time.
Do not bury deeper just to bury deeper if the slope disappears. A deep trench with a flat bottom can trap water just as easily as a shallow one. Depth and drainage have to work together. If the site forces a shallow crossing under a walkway or curb, protect that short section with a sleeve, insulation, or reroute it altogether.
A buried line is not automatically safe. It is safe only when it is deep enough for the climate and shaped so it can empty.
3. Build drainage into the line, not just the valve box
So, build drainage into the line, not just the valve box, because a dry pipe is far less likely to split in a freeze. Give the line a path to drain completely, because a dry pipe is far less likely to split in a freeze. A drain valve at the low point, a slight fall in the main run, and a layout that avoids dead ends are the basics.
The mistake many generic guides miss is this: “winter shutoff” by itself is not protection if water remains trapped in the pipe. A shutoff valve closes the supply, but it does not remove what is already inside the line. If there is a low spot between the shutoff valve and the zone piping, that section can still freeze. Drainage is what turns shutdown into protection.
Use gravity first. Run the pipe so it falls toward the drain point, not away from it. Avoid dips created by settling backfill or by a trench that crosses roots and then sags later. A small sag can hold enough liquid to create a hard ice plug. Put the drain valve where it can actually empty the run, not where it looks convenient in the valve box.
For systems with multiple branches, make sure each branch can drain on its own. One branch may empty cleanly while another stays full because of a hidden high spot or a check valve. Backflow devices, pressure-regulating parts, and controller-fed valves can all hold residual water if they are not arranged with drainage in mind.
A line that drains fully is the closest thing to passive frost protection. A line that “mostly drains” is often the one that fails first.
4. Insulate the exposed parts that still see cold air
However, insulate the exposed parts that still see cold air, because insulation helps most where the pipe cannot be buried deeper. Wrap or shield the sections that remain shallow, exposed, or inside the valve box, because insulation helps most where the pipe cannot be buried deeper. Closed-cell pipe insulation, rigid foam board, and a lid that fits tightly can all reduce heat loss around vulnerable parts.
Use insulation as a supplement, not as a substitute for depth. It slows heat loss; it does not create heat. That means it is useful for a short run near the surface, a meter of pipe entering a foundation wall, or parts inside a valve box, but it will not rescue a poorly drained line full of water.
The valve box deserves special attention. If the box is oversized, empty air cools fast. If the lid is cracked or missing, cold air drops straight onto the shutoff valve and drain valve. A snug lid, dry soil around the box, and insulation around the exposed fittings help keep the assembly warmer than the surrounding air. Do not pack the box so tightly that service becomes impossible, though. The box still needs access for repair and inspection.
There is a trade-off here. Heavy insulation can hide leaks and make the box slower to dry after rain. A damp insulated box can stay wet longer than an uninsulated one, which is bad news in a freeze. Keep the box clean and free of debris so it can drain and be opened easily.
This is the right fix when the weak point is a short, exposed section. It is the wrong fix when the whole route is shallow and flat.
5. Use winter shutoff only when the piping can empty
Next, use winter shutoff only when the piping can empty, because shutting off the shutoff valve without drainage leaves trapped water behind. Close the supply in winter only after the line has a way to empty, because shutting off the shutoff valve without drainage leaves trapped water behind. A winter shutoff works best on systems built with a drain valve and a clear route back to a low point.
The sequence matters. First stop feeding the line from the source, then let the remaining water leave through the drain point. If the system includes a backflow assembly or check valve, understand that those components can hold water in pockets unless they are part of a drainable design. A hidden pocket in a backflow body can freeze even when the rest of the line looks empty.
Check the valve box after shutdown. If there is standing water, mud, or ice around the fittings, that box is telling you the drainage is incomplete. A box that stays wet through a cold spell is not a harmless nuisance; it is evidence that the protected parts are still exposed. Clearing the box and improving the grade around it can matter as much as insulating the pipe itself.
Do not count on leaving the controller off. An off controller does not protect pipe, fittings, or a shutoff valve. It only stops programming. The plumbing still needs a physical plan for cold weather.
If the system is tied into an area with no drainage path and no safe way to lower the line, that is the point to reconsider the design instead of forcing a winter shutoff to do a job it cannot do.
6. Check the site conditions that turn a good layout into a bad one
Because site conditions can undo a good layout, keep the surrounding ground dry and stable. Keep the surrounding ground dry and stable, because thawed soil, settled backfill, and surface runoff can expose pipe that was once buried deep enough. A trench that looked safe in summer can become risky after one season of settling.
Soil settles faster where the backfill was loose or where a trench crossed a root zone. That settlement can reduce cover by several inches, and those lost inches matter. A shallow section near a downspout or slope is even more vulnerable because runoff erodes soil and leaves the pipe closer to the surface. Repair the grade so roof runoff, snowmelt, and lawn drainage move away from the valve box and pipe route.
If the line crosses a paved edge, expansion joint, or foundation wall, check those points after the first hard freeze. Those are the spots where movement and temperature change combine. A sleeve through a wall or under a slab should be sized so the pipe is not pinched when the soil shifts. A tight sleeve can create a hidden stress point that shows up later as a crack or leak.
The limitation here is plain: no amount of insulation or drainage helps much if the route keeps changing shape. Frozen-line problems often start as grading problems. Fix the soil, and the plumbing gets a much better chance of surviving winter.
For planning a new layout or revising an old one, this is the part of the job that belongs alongside the site-design guidance in the system design and planning hub.
7. When this approach is not enough
Ultimately, this approach is not enough for a system that is already damaged, badly undersized for the climate, or installed so shallow that there is no room to improve the burial depth or drainage. In that case, the right answer is redesign, not patchwork.
It is also not the right approach if the line repeatedly freezes despite a winter shutoff and drain valve. Repeated failure means the site conditions are still wrong. A thicker layer of insulation will not fix a dead-end run that traps water, and a new shutoff valve will not solve a grade that slopes the wrong way.
The honest trade-off is cost versus permanence. Lowering a line, re-sloping a trench, or rebuilding a valve box takes more work than wrapping exposed pipe, but it addresses the cause instead of the symptom. If the property has a short window for work, prioritize the shallowest sections, the valve box, and any low points first. Those are the places where a frozen line is most likely to start.
What should a reader expect after these fixes?
A well-protected system usually has three traits: the pipe sits deep enough for the climate, the line can drain after shutdown, and the valve box stays dry and accessible. Those three together reduce freeze risk far more than one dramatic fix by itself.
If one of the three is missing, the system is still vulnerable. A deep line with no drainage can still burst. A drainable line that sits 3 inches below grade can still freeze. An insulated box with standing water can still damage the shutoff valve. The goal is not perfection; it is removing the conditions that let cold air and trapped liquid meet inside the pipe.
For a reader deciding where to spend effort first, start with the shallowest run, the worst low spot, and the valve box. Those are the places where a frozen line is most likely to start.
How do you stop irrigation pipes from freezing?
You stop irrigation pipes from freezing by burying them below local frost depth, giving them a slope that lets them drain, and protecting any exposed section with insulation or a tighter valve box lid. The key is to remove trapped water. A shutoff valve alone does not prevent freezing if the line still holds liquid.
Can buried sprinkler lines still freeze?
Yes, buried sprinkler lines can still freeze if they are too shallow, sit in wet soil, or hold water in a low spot. Burial helps, but it is not enough by itself. A line that is above frost depth or laid flat can still form an ice plug and damage fittings.
What should be drained before winter?
Drain the irrigation pipe, the valve box, and any low-point fittings that can trap water after the shutoff valve is closed. The line is the priority, but the box matters too because standing water around the drain valve or shutoff valve keeps parts colder and can freeze again after a thaw.
Drafted with AI; not yet reviewed by a person.