Last updated: October 11, 2026
Key Takeaways
- Before installation, I would want a clear sketch showing the house, hardscape, beds, turf, trees, utility locations, and main lines.
- A good map helps a system fit the yard instead of fighting it.
- The best head type depends on spacing, coverage pattern, and plant material.
- A strong zone layout groups plants by water need, sun exposure, and pressure demand.
A good residential irrigation layout starts before any trench is dug, and this article on How to Plan a Residential Irrigation Layout Before Installation focuses on mapping the yard, dividing it into zones, and matching each zone to the sprinkler or drip hardware it actually needs. The EPA notes that efficient irrigation can reduce outdoor water waste, and WaterSense suggests that many home landscapes benefit from careful design before installation. For a typical home, planning first can also help avoid dry spots, overspray, muddy corners, and a system that costs more to run than it should.
What a good irrigation plan answers before anyone digs

A good irrigation plan answers four things: what needs water, how much water each area needs, where the heads or drip lines should go, and how the system will be controlled. Before installation, I would want a clear sketch showing the house, hardscape, beds, turf, trees, utility locations, and the path of the main lines.
Start by walking the property with a measuring wheel or tape and a printed plat or sketch. Mark beds, lawn edges, slopes, and anything fixed like air-conditioning units, patios, fences, and driveway corners. The key here is the boundary line between zones — notice how a clean zone follows similar plant needs, not just whatever shape is easiest to trench. That is what separates a system that waters evenly from one that leaves one side soggy and the other side brown.
A contractor should also ask about local restrictions and water pressure before design work is locked in. In many areas, backflow prevention is required, and some municipalities limit watering days or hours. If you are in a freeze-prone climate, the plan should include drain-down or winterization access. If you are in a windy or very hot area, the layout may need tighter spacing or drip in more places than a generic plan would suggest.
How to map the property so the irrigation layout actually fits
A proper map is the difference between a system that fits the yard and one that fights it. I would treat the drawing as the job’s blueprint, even if it is only a scaled sketch on graph paper, and I would check it against a professional irrigation designer or installer if anything is unclear.
- Measure the yard perimeter and major features.
Check: Dimensions for house walls, fence lines, beds, walks, and slopes.
Do not: Guess distances or use only a satellite image. - Mark all water-use areas separately.
Check: Turf, shrubs, trees, foundation beds, vegetables, and narrow strips.
Do not: Put lawn and shrubs in the same zone just because they are adjacent. - Locate fixed hazards and access points.
Check: Meter, valves, cleanouts, service panels, and likely trench paths.
Do not: Run lines where future repairs would require ripping up finished hardscape. - Note sun, shade, and slope.
Check: South-facing beds, shaded lawns, runoff areas, and low spots.
Do not: Assume every part of the property dries at the same rate. - Identify water source details.
Check: Static pressure, available flow, pipe size, and backflow requirements.
Do not: Design around a spray pattern before confirming the supply can support it. - Draft zone boundaries.
Check: Similar plant material, similar sun exposure, and similar slope in each zone.
Do not: Build oversized zones that force mixed watering needs into one valve.
A practical check is whether each zone can be described in one sentence. If you cannot say, “front turf in full sun,” or “north bed with shrubs and drip,” the zone is probably too vague.
Which sprinkler heads belong where, and which do not
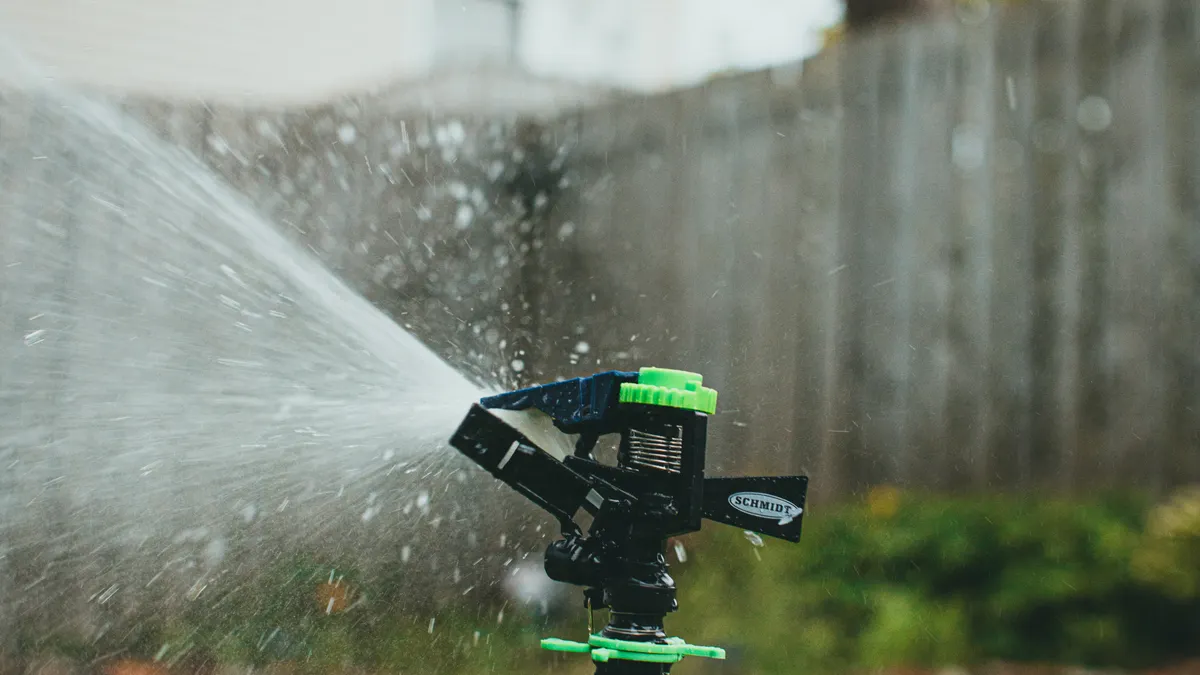
The right head type depends on spacing, coverage pattern, and plant material, not brand loyalty. Turf usually gets pop-up spray heads or rotors; beds often do better with dripline or micro-irrigation. Rotors are common for larger lawn areas because they throw farther, while fixed spray heads suit smaller, tighter spaces. Drip is usually the cleanest choice for shrubs, trees, and narrow planting strips.
| Area type | Typical hardware | When it fits | Common mistake |
|---|---|---|---|
| Small lawn section | Spray heads | Short throws, tight rectangles, narrow side yards | Using rotors that overshoot sidewalks |
| Larger turf area | Rotors | Longer throws and fewer heads | Mixing small and large arcs in one zone |
| Shrubs and foundation beds | Dripline or drip emitters | Root-zone watering and reduced overspray | Spraying foliage and masonry |
| Trees | Drip rings or emitters | Targeted deep watering | Placing emitters at the trunk |
| Sloped beds | Pressure-compensating drip | Slower application, less runoff | High-output spray that runs downhill |
The key detail is matched precipitation rate — notice how heads in the same zone should apply water at roughly the same rate. That is what keeps one part of the lawn from getting 15 minutes of water while another part gets 30. A bad layout mixes a spray corner with a rotor corner and then blames the grass when the middle turns patchy.
A contractor should also explain arc and radius before the install starts. Corner heads, half-circle heads, and full-circle heads are not interchangeable. A well-drawn plan shows overlap at the edges without throwing water onto hardscape by 1 to 2 feet.
How to divide zones so the irrigation layout can water evenly
A good zone layout groups plants by water need, sun exposure, and pressure demand. That is the part many generic plans miss, because they focus on covering area instead of controlling how water is delivered.
- Group by plant type first.
Check: Turf with turf, shrubs with shrubs, beds with beds.
Do not: Mix thirsty annuals with drought-tolerant shrubs unless the plant list really supports it. - Separate sunny areas from shady areas when possible.
Check: South and west exposures dry faster than shaded zones.
Do not: Give a shaded bed the same runtime as a full-sun lawn patch. - Keep slope in mind.
Check: Steeper grades need slower application or drip.
Do not: Put high-output spray on a slope that will shed water downhill. - Watch the number of heads per zone.
Check: The zone stays within the available flow and pressure.
Do not: Keep adding heads until coverage looks pretty on paper but fails in the field. - Limit odd-shaped zones.
Check: Each zone should be simple enough to troubleshoot later.
Do not: Make one valve serve three disconnected pockets if you can avoid it. - Label every zone clearly.
Check: Valve numbers match the drawing and controller labels.
Do not: Trust memory on a system with 6 or more zones.
For a typical home, 4 to 8 zones is common enough to be practical, but the right number depends on yard size, planting variety, and water supply. A contractor who pushes one giant zone for convenience is saving labor at your expense.
What the site conditions change in real life
Site conditions change everything from head spacing to trench depth. Soil texture, slope, wind, and local climate can turn a decent layout into a poor one if they are ignored. In clay-heavy soils, I would expect slower application and more careful scheduling because runoff arrives quickly. In sandy soil, water moves down faster, so shorter, more frequent cycles often make more sense.
If you are in a freeze area, ask how the system will be winterized. Some regions need blowout access and insulated valve placement. If you are in a drought-restricted area, the layout should lean harder toward drip in beds and efficient nozzles in turf. Many contractors reference guidance from local extension services and equipment standards from the Irrigation Association or the American Society of Irrigation Consultants when they design around pressure, precipitation, and drainage.
A visual clue tells you a lot: if the plan puts spray heads right beside a sloped driveway, expect overspray and runoff unless there is a clear reason. If the plan keeps the heads back from the edge and uses matched nozzles, that is a better sign.
How to budget the job without getting surprised
A residential irrigation install usually costs less when the layout is simple, the soil is easy to trench, and the system can use fewer valves and shorter pipe runs. Price rises with lawn size, number of zones, trench difficulty, controller type, added drip zones, and extras like a backflow preventer or rain sensor. Because labor and local code drive much of the cost, a small suburban yard can price very differently from a larger property with slopes, rock, or dense roots.
| Cost driver | What it changes | Why it matters |
|---|---|---|
| Yard size | Pipe length and head count | More footage usually means more labor and material |
| Soil and roots | Trenching time | Hard clay and roots slow the crew down |
| Number of zones | Valves, wire, and controller channels | More zones increase parts and setup time |
| Drip conversion | Emitters and pressure regulation | Useful, but adds design detail |
| Code requirements | Backflow, permits, inspections | Can add parts, labor, and scheduling steps |
Ask for a proposal that separates design, materials, labor, and any permit or inspection fees. That makes it easier to compare bids that look similar at first glance but hide different assumptions. A vague lump-sum quote is a warning sign if it does not say how many zones, what type of heads, or whether winterization is included.
For timing, a straightforward residential system may take a day or two, while larger or more complex properties can take several days. If the contractor promises a complicated install in a single afternoon, I would want to know what got left out.
What to ask a contractor before installation starts
The best contractor is the one who can explain the layout on paper before a shovel hits the ground. I would ask for a drawing showing zone boundaries, head locations, valve locations, controller placement, and the route of any mainline or lateral line. I would also ask how the layout handles low pressure, slope, and future repairs, and I would check those details against a professional spec or manufacturer guidance.
- Ask how the zones were grouped.
Check: The answer should mention plant type, sun exposure, and pressure needs.
Do not: Accept “that’s just how we always do it.” - Ask what hardware is going in each zone.
Check: Head type, nozzle type, and whether drip is pressure-regulated.
Do not: Let the contractor substitute parts without explaining why. - Ask how overspray is prevented.
Check: Setback from sidewalks, arc adjustment, and nozzle choice.
Do not: Rely on “we can angle it later” as the whole answer. - Ask about backflow and code compliance.
Check: Permit needs and required device placement.
Do not: Assume the backyard install is exempt from local rules. - Ask what happens in winter or during service.
Check: Blowout access, valve box access, and shutoff location.
Do not: Bury everything where repairs require tearing up finished landscape. - Ask for runtime guidance after installation.
Check: Suggested schedules by zone, not one timer setting for the whole yard.
Do not: Treat the controller like a one-and-done setup.
A bad job often looks tidy on day one and wrong by week three: water on the sidewalk, a corner that stays dry, low spots that puddle, or plant beds that are constantly wet at the crown. That is why the planning stage matters more than polished surface work.
What a finished plan should look like on paper
A finished plan should be readable by a second person in under 10 minutes. It should show the property outline, every zone, head types, valve numbers, pipe routes, and controller notes. It should also include any known constraints such as slope, low-pressure areas, hardscape setbacks, and local code requirements. If the sketch is vague, the install will be vague too.
The clearest plans use one line style for mainline, another for lateral lines, and symbols for each sprinkler type. The key here is clarity at the valve box — notice how every zone is labeled in the same place on the drawing. That is what prevents confusion later when one zone fails and someone has to isolate the problem.
A strong plan usually includes:
- Property boundaries and dimensions
- Planting zones by type
- Head locations and arcs
- Valve locations
- Water source and backflow location
- Controller location
- Notes on slope, shade, and drainage
- Any permit or inspection requirements
If those eight items are missing, the plan is not ready yet. I would rather delay installation one day than inherit a layout that cannot be maintained.
FAQ
How many zones does a residential irrigation system usually need?
It depends on yard size, pressure, and plant variety, but many homes land somewhere between 4 and 8 zones.
Drafted with AI; not yet reviewed by a person.